Saturday, December 29, 2012

Picture "Name" Tags

I got this idea from my wonderful Grandma, in Idaho.
This year, I decided to do all our Christmas Gifts with picture "name" tags. Our daughters are 3 & 1. Not really able to read names yet. So I printed pictures onto card stock, cut them out, and had instant tags for presents. Super easy. Super adorable.
 
 
We even did these tags for our extended family. I loved it. My 3 year old totally loved it. She was able to pick out the presents and hand them out without any help.

Monday, December 24, 2012

Make your own Cooking Spray FAIL

Tried THIS
FAIL.
I will continue to buy real cooking spray.
Plus, after I tried it out, I read in the comments about keeping it in the fridge and stuff. Good post. HERE

Cheesecake Dip

Merry Christmas Eve!!!
Today, our family decided to all get together and watch a movie at my parents house. I saw this on Pinterest, and thought this would be an excellent time to try it out.
Cherry Cheesecake Dip!
Super easy, super yummy!! It was kind of addicting to me.
The recipe was found HERE.
I was reading some of the comments, someone said that theirs was gritty. Mine was when I first made it, but I let it sit in the container overnight so all the "grittiness" dissolved. I guess. Ha.
Anyways.
 
Here is the recipe:
Mix Jello No-Bake Cheesecake mix with one container of Cool Whip.
Chill.
Top with a can of cherry pie filling.
Serve with graham crackers.
 
It didn't say how big of a Cool Whip to use. I used the smaller of the 2 available. When I took it out of the fridge, it was kind of stiff (in the picture the original one was super fluffy). Which that didn't bother me, I thought it looked great as it held the shape of the cool whip container.

All in all, it was a hit. I would totally make this again.

Wednesday, December 19, 2012

Shut the Front Door

Yup. This really did just happen.
This is now on my front door. Not sure if the hubs is too fond of it yet, but I find it hilarious. I always say this... So. Why not?
 
Ha. It makes me giggle. It also puts a smile on my face.

Wednesday, December 12, 2012

Young Women Torch Handout

A couple weeks ago, I made these handouts for our Young Women. Soooooo cute! They were such a big hit. What a great idea! You could totally change these up for any YW occasion, just change "Arise & Shine Forth" to the new theme, or whatever you want it to say.
I found the torch idea HERE. Mine are totally not as perfect as hers, but I (along with the help of my cute hubs) made these in about 30 minutes. The longest part was trying to find the ding dong lemon heads that she used in her torches, but after searching store to store, we purchases Reeces Pieces. I do not regret it. I love me some Reeses. Yummmm.
I found my clear bags at a fabulous place called "PAK-N-Wrap" in Sandy. HERE is the link to their Facebook Page.
They have a ton of great stuff- these clear bags, gift wrap, ribbons, bows, greeting cards, stationary, envelopes, & etc. Awesome place. Will be going there more often.

Sunday, December 9, 2012

Daily Cleaning List

Ok. So I didn't find this on Pinterest. *gasp!* I know right???
I don't know about you, but I strongly dislike cleaning. I know I'm probably the only one out there, but dudes. It's bad. I will start, and have awesome intention. Then.... I get distracted and totally go off on something else. Ugh. Oh. I super hate laundry too. I swear, adding a 2nd kid into our family has totally like tripled our piles of clothes. Ok, ok... Maybe not tripled, but it sucks. I am lazy. I can admit it, but last night I had this crazy idea. What if I made a daily cleaning checklist?? Hmmmm.... And what if I hang it above my computer screen so when I am scrolling around Facebook & Pinterest, I might have a little guilt. Hmmmm. Yes. This might work!!
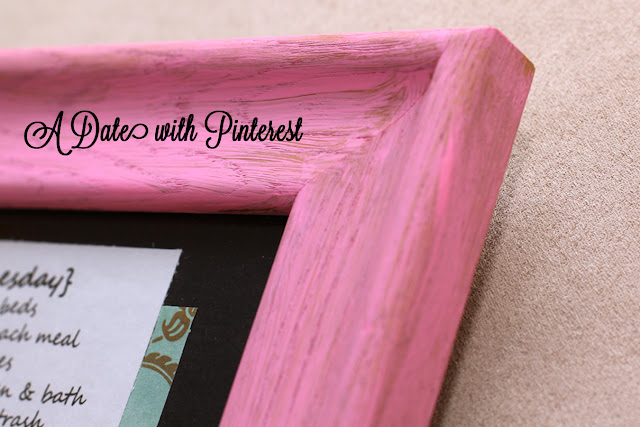
So. I made THIS beauty after the kids went to bed.

Kind of cute, right? Maybe pink isn't your color.... But for me, it so is.

I mean, check out my old VW Beetle... Ahhh, what a beaut.


My laundry room....

CRAP! See, DISTRACTED!
Anyways. The frame was fun, quick, and it's super cute!
I found an old wood frame, did a quick paint job, frame- done.
I made a list of all the chores that we needed to get done to keep up on things, separated them between the days, some have more that others, printed them out, cut them out, lists- done.
Cut a piece of scrapbook paper, glued it down on the black backer board thingy, glued the lists- done.
Put it all back together.
Cut some vinyl. Stuck it on.
BAM! Done. Super cute.

Also, since it's in a picture frame, I could use a dry erase marker & check-a-roo stuff off!!
Another good thing about the list, when I'm not home, the hubby could see what needs to get done... Sooooooo, no excuses, righhhhht??? Heehee....

Here is what I have for each day, you might want your days different than mine, of course:

Monday:
Make Beds
Sweep after each meal
Do Dishes
Wipe down kitchen & bath
Empty kitchen trash
Vacuum upstairs
Laundry- kid clothes
Sort mail
Clean out fridge
Pick up whole house

Tuesday:
Make Beds
Sweep after each meal
Do Dishes
Wipe down kitchen & bath
Empty kitchen trash
Vacuum downstairs
Laundry- Sheets & towels
Sort mail
Wipe doors & light switches
Pick up whole house

Wednesday:
Make Beds
Sweep after each meal
Do Dishes
Wipe down kitchen & bath
Empty kitchen trash
Vacuum upstairs
Laundry- Reds
Sort mail
Deep clean bath (toilet, tub, mop, mirrors)
Deep clean kitchen (microwave, stovetop, chairs, mop)
Pick up whole house

Thursday:
Make Beds
Sweep after each meal
Do Dishes
Wipe down kitchen & bath
Empty kitchen trash
Vacuum downstairs
Laundry- darks
Sort mail
Dust
Pick up whole house

Friday:
Make Beds
Sweep after each meal
Do Dishes
Wipe down kitchen & bath
Empty kitchen trash
Vacuum upstairs
Laundry- Jeans
Sort mail
Pick up whole house

Saturday:
Make Beds
Sweep after each meal
Do Dishes
Wipe down kitchen & bath
Empty kitchen trash
Vacuum downstairs
Laundry- whites
Sort mail
Pick up whole house

Sunday:
Make Beds
Sweep after each meal
Do Dishes
Wipe down kitchen
Empty kitchen trash
Pick up whole house


I'm not a professional crafter, by any means. So don't judge.
Off to enjoy Sunday dinner!

Friday, December 7, 2012

Pumpkin Better Than ... Cake

My husband's favorite cake is BTS cake. Mmmmmm. For his birthday & our anniversary, I always make it for him. When I saw this recipe on Pinterest, I wondered if this would be a huge hit as well!
 
This was super easy to make. It's major yummy! Definitely super sweet & rich, but that's how BTS cake is. The day after I made it, I wanted it for breakfast, naughty me. I was able to take 2 bites and then I was done. I guess I'm not as young as I feel... Ha!
Keeping this on our Yummy list.

Anyways, here is the recipe.
The recipe is from Something Swanky.
Ingredients
  • 1 box yellow cake mix
  • 1 small can pumpkin puree
  • 1 - 14 oz. can sweetened condensed milk
  • 1 - 8 oz. tub cool whip
  • 1/2 bag Heath Bits
  • Caramel Sundae Sauce
Instructions
  1. Mix together the cake mix and the pumpkin puree (DO NOT add the other ingredients on the cake mix box).
  2. Pour batter into a well greased 9x13 baking dish. Bake at 350º according to the directions for a 9x13 cake on the cake mix box.
  3. Let cool for about 10 minutes after baking. Using the bottom of a wooden spoon, poke holes all over the top of the cake.
  4. Pour the sweetened condensed milk over the cake, filling the holes. **I actually put caramel over the top of the milk, yummmm** Refrigerate for 30 minutes.
  5. Spread the cool whip over top of cake. Sprinkle on the heath bits, and drizzle caramel over top (just to your liking). Refrigerate for 3-4 hours, or overnight (best).
Notes
DO NOT USE PUMPKIN PIE FILLING. YOU MUST USE PUMPKIN PUREE IF YOU WANT THE CAKE TO BAKE CORRECTLY. The cake mix + pumpkin puree version of pumpkin cake may not be for everyone. I like it just fine, especially when it's soaked in SCM and caramel. But if you're not sure about it, feel free to substitute your own pumpkin cake recipe as the cake base. DO NOT mix together the pumpkin, cake mix, and the other ingredients on the back of the cake mix box!!!! ONLY mix the cake mix and the pumpkin puree. You must let the sweetened condensed milk soak in all the way. Letting it sit overnight will yield best results. Use the bottom of a wooden mixing spoon to poke the holes in the cake-- it's just the right size.

Thursday, November 29, 2012

Apple Pie Caramel Apples

Today, I attempted to make these beauties.

I have never made a caramel apple. But these looked FAB. I figured, what the heck.
THIS is where I got the recipe from.
Hers looks way better than mine. Don't judge.
Anyways- here is the recipe.
 
Apple Pie Caramel Apple
Ingredients:
1 bag Kraft caramels
4-5 large, tart apples (You can use red apples too but I like the contrast of the tart apple with the caramel)
1 bag white chocolate chips or white chocolate candy melts
cinnamon sugar
 
Directions:
1. Wash, scrub, and dry apples. This is important or your caramel won’t stick because of the coating stores put on apples.
2. In a medium saucepan, melt caramel according to package directions.
3. Put popsicle stick in the apple. Dip in melted caramel making sure to fully coat it. **I thought I had popsicle sticks, but I did not. I only had the sticks for like suckers & cake pops. I highly recommend popsicle sticks. They'll be easier to eat in the end**
4. Place on parchment or wax paper that has been sprayed with cooking spray. **Tried the sprayed wax paper. They still stuck, and a litttttttle bit of the paper ripped off. I used a mat for the chocolate layer, worked much better for me.**
5. Cool in the fridge until caramel is set up. If you want a thick caramel layer, add another layer of caramel here and let it set up again.
6. Melt chocolate chips in the microwave in 30 second intervals. You can add a little shortening if the mixture is too thick.
7. Coat the apple with the chocolate.
8. Let it set up a little bit before sprinkling it with the cinnamon sugar mixture. **This is a must. Look at the back left apple. HA!** 
9. Cool completely in the fridge.
10. Cut into slices and serve.
Can be made up to one day ahead of time. Store in the refrigerator.

It took me 2.5 apples to finally figure it out. The chocolate part needs to be quick, my caramel melted if I took too long.
These were SUPER yummy! Totally keeping on our keep list.
 

Monday, November 12, 2012

YUMMY Homemade Chicken Noodle Soup

WOW! I have not been on Blogger for waaaaay too long! It's all totally new and different. How fun!

I haven't been on Pinterest for a very long time either. Well, yesterday, I got an email saying that one of my pins that had only 15 pins, was repinned & repinned until it hit 112! I was kind of in shock. So, I decided that I should get back on this "A Date with Pinterest" thing. My husband misses all the yummy food I use to make. Of course, we don't miss the yucky. But the goodness makes up for the awfulness.

The other day I decided to make a super YUMMY chicken noodle soup from scratch. The canned stuff is kind of "meh" to me. My mom has been making this recipe forever. The noodle recipe is actually my Great-Great-Great-Grandma's recipe. In one of her books, she wrote in the column a little story about the noodles. She wrote, "I was down to my final 3 eggs and decided to make noodles with them to make them stretch further. I made the noodles, rolled them extra thin, and set them out to dry. Then the horse got at them. I would have killed that horse if we didn't need him so much!" Lol! So funny.

Ok, here we go! I don't really have a recipe, but in the end I will list everything you will need.

 
Yummy Homemade Chicken Noodle Soup!

So, I baked 3 small chicken breasts in the oven, just covered the tops with salt & pepper. You can use more or less chicken.
While the chicken was baking, I cut up some carrots, celery, and onion. And put those aside. I probably used 2 stalks of celery, 4 carrots, and half an onion
Then I put 10 cups of water on the stove to boil. I didn't have any chicken broth, but if i did, I would use like 6 cups broth, and 4 cups water. Since I didn't, I will be using 6 cubes of chicken bouillon.
While I was waiting for the water to boil. I made the noodles.

Here is my Great-Great-Great-Grandma's recipe :)
2C flour
3 Eggs
2tsp salt
1/4-1/2C water
Mix. Roll SUPER thin. They will grow when boiled, and I sometimes forget and have monster flour noodles, no good. Then cut into strips.

Once the water begins to boil, drop in the bouillon cubes to dissolve. After they're dissolved, add the noodles and then the veggies. After it boiled a while, my chicken finished, so I shredded it up, and dropped it in. Then turned down the heat a little.

In the end, I mix a little corn starch with COLD water until smooth, then slowly add it to the soup to thicken it up a little.
Add a little salt & pepper to taste.

BAM! Done.

:)
It's pretty easy. And soooooooo yummy!!

Ready for a kicker?? People think we are CRAZY!! But we LOVE to serve this over some homemade, warm, fluffy mashed potatoes. I know, I know... I'm half Idahoian, I love my potatoes!! But really. Try it. You will be amazed. I swear. My sister in law thought we were nuts, then she tried it because that's how we all were eating it. Yup, she loved it.


Ingredient overview:
3 small chicken breasts
Celery
Carrots
Onion
10C Water & 6 cubes of Chicken Bouillon OR 4C Water & 6C Chicken Broth
Salt & Pepper
2C Flour
3 Eggs
2tsp Salt
1/4-1/2 Water

Monday, February 13, 2012

Potato, Peas, & Bacon

THIS is what we had for dinner tonight!!
This is MY recipe! YAY!

 
All I did was peel & cut potatoes to bite size pieces. Then put them on to boil for about 8 minutes.
Once it started boiling, I started to make the sauce/gravy. In a pan I melted about 1/2 stick of butter, then while stirring with like a w...isk I added flour until it stirred into like a ball. Then I added 2-3cups milk (depending on how many potatoes). And put salt & pepper in (it's a must, or the sauce is bland)
When there is about 1 min left, I added the peas to the boiling water in potatoes.
Drain potatoes. Put back in pan. Dump sauce in. Done & done. :) if the sauce is too thick for you, you can add milk I believe.
Top it with bacon. :) yummmmm

Banana Bread Pancakes

The other night I didn't know what to make for dinner... I looked on the counter, we had bananas! And I had just seen this Pin! PERFECT!!
I was really excited!
And.... They are sooooooo YUMMY!! So so yummy!!
Recipe & Picture from HERE
So, the recipe is for wheat pancakes, I just used the all purpose flour. We also just used good ol' homemade maple syrup for the topping, although the glaze listed sounds heavenly!

Whole Wheat Brown Sugar Banana Bread Pancakes
makes 12 pancakes
2 cups whole wheat pastry flour
2 teaspoons baking powder
1/4 teaspoon salt
1/4 cup brown sugar
1 teaspoon cinnamon
1/4 teaspoon nutmeg
2/3 cup milk
1 tablespoon vanilla extract
3 large ripe bananas, mashed
2 tablespoons butter, melted
In a large bowl, combine flour, baking powder, sugar, salt, cinnamon, and nutmeg in a large bowl. Measure out the milk and add the vanilla extract to it. Whisk together the dry ingredients and add in milk and vanilla, stirring to combine. The mixture will still be dry. Add in mashed bananas and mix. Add in melted butter and stir until batter is somewhat smooth.
Heat a skillet or grilled on medium heat. Using a 1/3 cup measure, spoon batter into rounds and cook until bubbles form on top – about 2-3 minutes. Flip and cook for a minute or two more. Repeat with remaining batter. Serve hot with butter and syrup, or the vanilla maple glaze.
Note: if you don’t have/can’t find whole wheat pastry flour, use 1 cup of regular whole wheat and 1 cup of all purpose. Or 2 cups of all purpose.

Vanilla Maple Glaze
1/2 cup maple syrup
3/4 cup powdered sugar
1 teaspoon vanilla extract
Combine all ingredients in a bowl and stir until smooth. Pour over pancakes.

Crack Potatoes

Made these.
Wasn't a fan.

Recipe & picture found HERE

Sonic Cherry Limeade & Cherry Coke Float Cupcakes

YUM.
Major.

For the Super Bowl, I decided to make these 2 items for our guests.... And they were fabulous!!!
My favorite, Sonice Cherry Limeade. AMAZING. And so beyond yummy!!
I didn't take a picture of it... Darn it.
So here is the website with the recipe & where I got the picture:

1 can frozen limeade concentrate,
1- 2 liter bottle Sprite,
Juice from 1 10 oz jar cherries
Fresh limes (optional, I didn't use them)
Put it all together. Done & done. Fabulous and so yummy!!

 
Next up, Cherry Coke Float Cupcakes
(Recipe found HERE)
Mine looked NOTHING like the pictures on that site, but I don't mind. They were yummy in my tummy. I ate probably 4 a day until they were gone.... No lie. And I thought I'd gain a crapload of weight from it, negative. I actually woke up Saturday and could fit into my skinny jeans. So, WHEW!
Here's the recipe:

For the Cake:

  • 3 cups all purpose flour
  • 6 T cocoa powder
  • 1 tsp baking soda
  • 1/2 tsp salt
  • 1 1/2 cups sugar
  • 1 cup unsalted butter, room temperature
  • 2 large eggs
  • 1 cup buttermilk
  • 1 1/2 cups Coke (don’t use diet)
  • 3 tsp vanilla extract
  • 1 can cherry pie filling

For the Glaze:

  • 1 1/2 cups powdered sugar
  • 3-4 T Coke
 For the Icing:
  • 1 1/2 cups heavy cream
  • 6 T powdered sugar
  • 1 teas Whip-It (optional*)
  • Maraschino Cherries for garnish

Preparation:

For the Cake: Preheat the oven to 350 degrees and line muffin pans with cupcake liners. Mix together flour, baking soda, salt and cocoa in a bowl and set aside.
In a mixing bowl, combine sugar and butter and beat on medium-high until light and fluffy. Mix in the eggs one at a time, beating well after each and scraping down the sides if needed. In a small bowl, combine buttermilk, Coke and vanilla extract, making sure to let the foam calm down after you mix it in. Foam will do us no good here.
Beginning with the your flour mixture, add to the butter mixture, alternating with the Coke mixture in 4 parts. Beat each addition just until incorporated.
Fill each muffin tin about 2/3 of the way full. Bake for 18-20 minutes until the tops spring back when touched lightly and a toothpick inserted in the center cupcake comes out clean. Cool 5 minutes in the pan and then transfer the cupcakes to a wire rack to cool completely.
Once cooled, use a paring knife to cut out a cone shape in the middle of each cupcake. Add a spoonful of cherry pie filling to each cupcake. You may want to try to chop the cherries up a bit. The whole cherries were a bit hard to fit in each cupcake. Strain and reserve the liquid, give the cherries a quick chop, and then toss them back in the liquid before filling each cupcake.
For the Glaze:
Mix together powdered sugar and coke with a whisk in a small bowl until no lumps remain adding more or less sugar if needed. You want a thicker constancy, one that will glaze the cupcake but not disappear down the sides or into the cupcake.
For the Icing:
Chill your mixing bowl for 10 to 15 minutes before you are ready to make your icing. Beat cream in a chilled bowl with whisk attachment or hand mixer on low speed. If using, add the Whip-it then begin to add the powdered sugar, 1 spoonful at a time, increasing speed as the cream comes together. Whip the cream until it holds stiff peaks. Using your favorite tip, pipe the whipped cream onto cupcakes and top with maraschino cherries.

Doritos Casserole

We LOVE Doritos in this house... So when I found the recipe for a Doritos Casserole, I totally wanted to try it... Well. It sucked. And I won't make it again.
Wish I could find the link... When I do, I'll be sure to post it.
That's all.

Sunday, January 29, 2012

Chicken Rollups & Italian Cream Soda

Tonight we made Chicken Rollups. They look soooooooo yummy on her post!! And sound so yummy too!! But... I wasn't a huge fan. Plus, mine didn't turn out anything like hers looked. My two year old wouldn't even eat them... We had a whole bunch of leftovers. They weren't a vomit, kind of horrible... But they weren't for our "keep" list.
(Chicken Rollup recipe here

The YUMMIEST thing for the night was when I made our Vanilla Italian Cream Soda's! They were FANTASTIC!!! Super yummy! These are on the top of our keep list, along with our Chili.
I didn't have a specific recipe that I went with... I kind of just made it up as I went.

What you need:
Tall glasses
Ice
Flavor syrup (I went with Vanilla, it was found on the coffee isle)
Club Soda
Half & half
Straws
Put a couple ice cubes in the glass. Pour flavor syrup over the ice, about an inch of syrup (give or take). Pour club soda in, I stopped about 2.5 inches from the top. Add some half & half. (Just until it looks good)  Add a straw. Stir. ENJOY!!

Thursday, January 26, 2012

Chili & Cornbread

First up, I decided to make a copy cat "Wendy's Chili" recipe. I LOVE Wendy's chili, so I was pretty excited to try this out. It was super simple, and super YUMMY!! My husband & 2 year old daughter both totally enjoyed it! This is for sure on the "keep!" list! 
2 lbs. fresh ground beef
1 qt. tomato juice
1 (29 oz.) can tomato puree
1 (15 oz.) can red beans, drained
1 medium onion (1 1/2 c.), chopped
1/2 C. celery, diced
1/4 C. green pepper, diced
1/4 C. chili powder (you may want to use less, some people find this is too much)
1 tsp. cumin (if you like real flavor, add more)
1 1/2 tsp. garlic powder
1 tsp. salt
1/2 tsp. each: black pepper, oregano, sugar
1/8 tsp. cayenne pepper
In a frying pan, brown the ground beef; drain. Put the drained beef and the remaining ingredients into a 6-quart pot. Cover the pot; let it simmer for 1 to 1 1/2 hours, stirring every 15 minutes.

(Wendy's chili recipe found here)
**I didn't use 1/4C chili powder, we used probably 2 tablespoons and I thought that was plenty.**

Next up is the corn bread.
My husband said that his mom always made cornbread to go with chili. Today was her birthday, she would have been 59 years old. Happy Birthday Mom! Since it was her birthday, I found it fitting to have this tonight.
I thought this was just Ok cornbread. It didn't look like the picture on her site. So maybe I messed up somewhere? It was ok, probably won't be making this one anytime soon.
(Cornbread recipe found here)

Wednesday, January 25, 2012

What's for dinner?

I usually really don't like deciding what to have for dinner. 5:00 rolls around, "Crap! What's for dinner??" Before I went grocery shopping, the thought came to me... I ALWAYS pin yummy foods on Pinterest, but never make them. Why not? They look delicious & usually pretty easy. So, I decided to try a bunch out this week.
Here we go!